

DIY Cat in the Hat Costume – in a Pinch!
On a Friday night my son mentioned he was going to be The Cat in the Hat for his school book report on Tuesday. Now, I knew a book report was coming, but he had planned to wear his old Ninjango costume for it so I hadn’t planned on doing anything.
He explained that all the other kids were wearing their costumes to school for the day and there was no way he could wear his big and bulky Ninjago mini-figure costume.
He also explained that he had already switched with his teacher and lo and behold there was a letter in his Friday folder reminding me that he would be the Cat in the Hat on Tuesday.
I ran to Party City to get a hat, convinced we could make the rest but they didn’t have a kid’s hat in the middle of spring, go figure. Thankfully Amazon is super fast and we were able to pull together a fun costume for his book report complete with props!
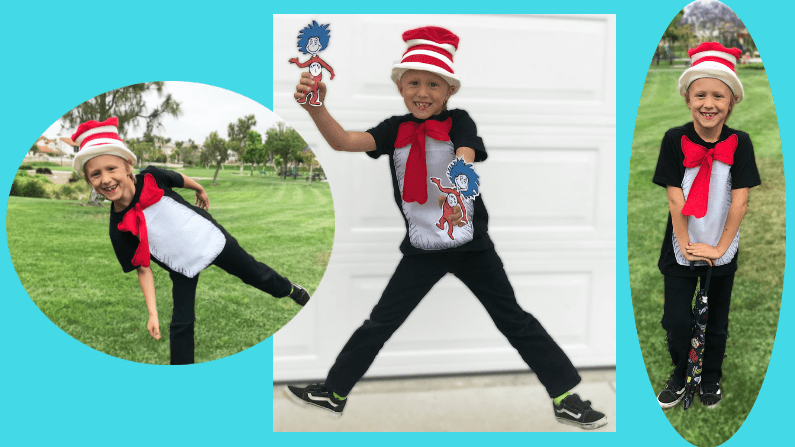
This costume was super easy and you could add to it for Halloween with some whiskers and a black nose. We kept it simple since his report was at the end of the day so he needed to be able to sweat playing dodge ball at lunch BEFORE he did his report.
Apparently, this was the key to my normally quite shy child’s heart because he was so happy with his costume! You can tell by the poses that he had a blast and really enjoyed being dressed up, but still able to play.
He had so much fun that it was the first time he’s ever gone OVER the time limit when giving a class speech, lol. He’s usually quick and done!
To make this costume you need very little!
What you need:
- A hat – we found this one on Amazon. (note – my son’s head is on the larger size and this almost didn’t fit but fit my 10 yr old fine. So depending on your child’s head shape, you may want to go up a size).
- Black pants (we had them on hand)
- A plain black t-shirt (we found ours at Target for $5 – score!)
- A very small amount of white felt fabric ( 1/4 yard will do)
- A very small amount of red felt fabric ( 1/4 yard will do)
- A black sharpie
- A hot glue gun
*Felt is easiest if you are using hot glue so you won’t burn your fingers.
To make the bow:
Simply take a strip of the red felt (about 2 feet long, 2 inches wide) and tie a knot. Once the knot is tied, cut off the top above one side of the knot so it looks like the middle and bottom part of the tie.
Then, make the bow shape and hot glue the two pieces together.
To Assemble:
Cut the belly shape out of the white felt, it doesn’t need to be perfect, just oval-ish and do a wide hand-stitch to attach it to the shirt. I used white thread and you couldn’t even see it when done. If you choose hot glue instead of hand sewing, put a board or something hard inside the shirt so you don’t accidentally glue the t-shirt closed.
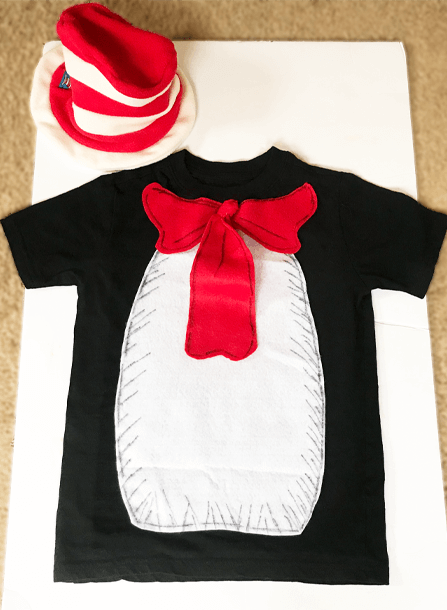
Add the red bow. I hand stitched this to the shirt by sewing right below the knot. I thought about hot glue but was worried it wouldn’t hold for the day.
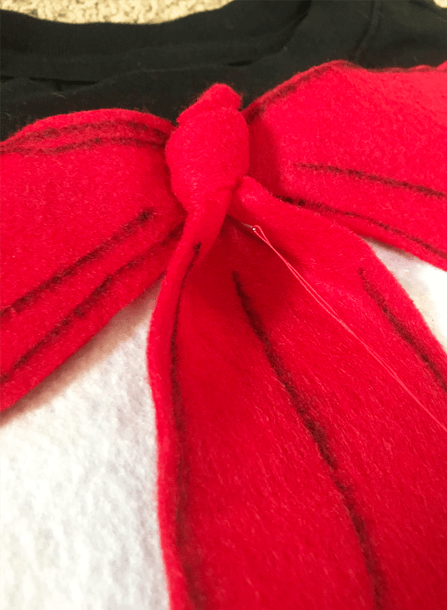
It looked like it needed a little cartoon-ish-ness added so I used the black sharpie to draw the little lines, like fur and drawing marks on the red bow but you can skip this step if it’s not your style.
That’s it! Couldn’t be easier.
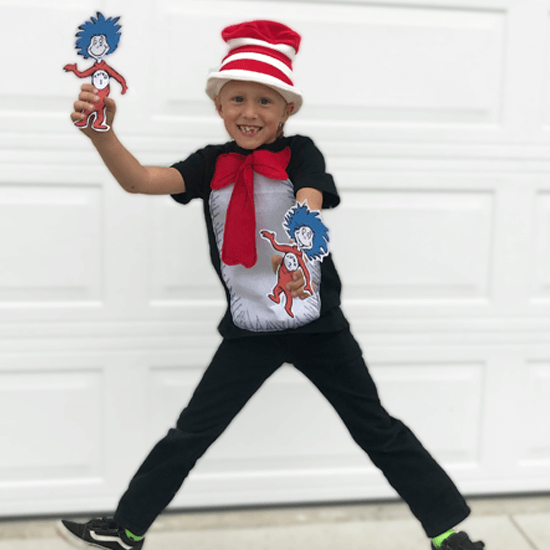

The book report was very interactive and could have props. So we added Thing One and Thing Two and he took an umbrella.
To make Thing One and Thing Two we printed it using THIS clip art and glued it to a piece of card stock I had on hand to make it firm. Easy peasy!
If you make this costume, let me know how it turns out!

Become part of our "Messy" community
and never miss a post.


Nicole is the Creator/Editor for Mind Over Messy. She has two "spirited" boys and a family that loves adventure. From enjoying a home cooked meal, meditating, being present for even the most challenging moments, to night snorkeling in Hawaii, you can find it on this website. If you're interested in Guest Posting on MindOverMessy.com, click HERE for more information.
like your page
sigma gyatt