
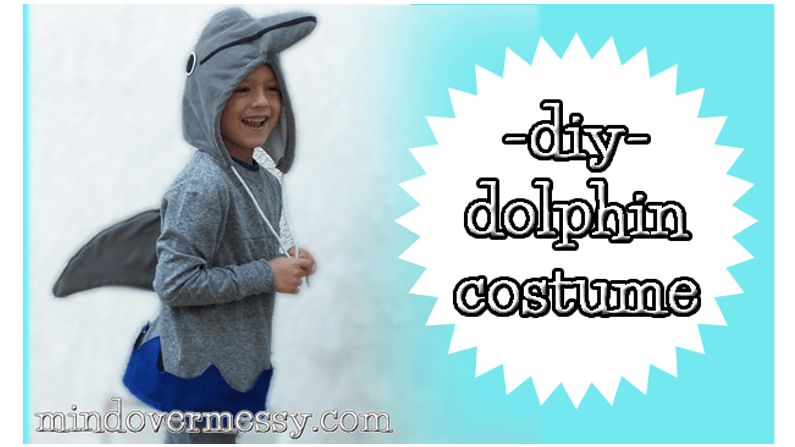
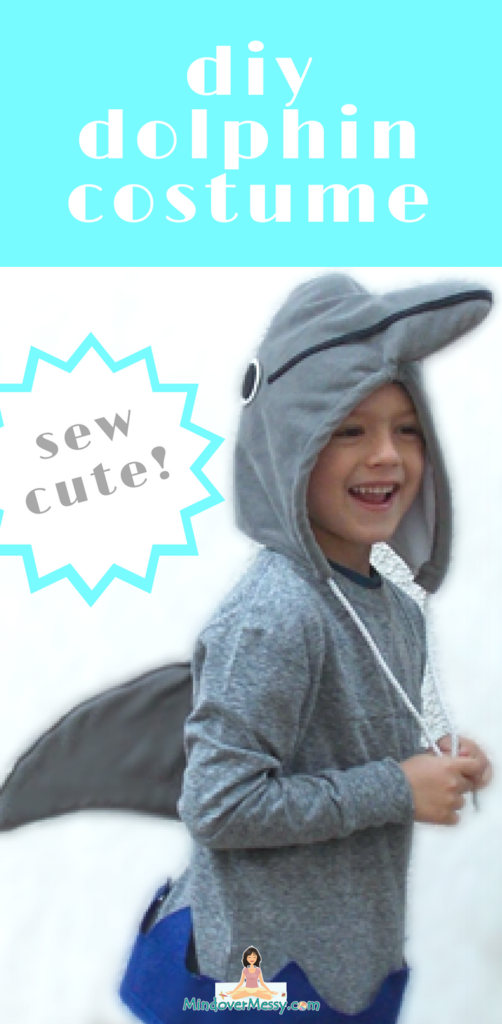
DIY Dolphin Costume with Free Downloadable Pattern
I recently had a reader say about this DIY Dolphin Costume, “You’re lucky you can sew!” I had to laugh because I think I fall into the “I have no idea how to sew” category myself. Everything I make might look challenging, but it’s actually on the easier side. I mean, I am the type of person who keeps forgetting how to make the bobbin and has to watch the video that came with my sewing machine. In fact the reason I chose this sewing machine is because someone wrote in the reviews that they liked the “how to” online video.
What I can do is pin things together, and manage one simple stitch which seems to work for almost everything. With that, I have been able to make costumes for my son who only seems to get his heart set on ones that do not exist for purchase.
So for those of you with kids who also want to be a dolphin (which is very hard to find ready made AND affordable), here is how I was able to do it.
Please Note: I wrote this tutorial exactly as the costume is pictured, but if you want to make this in an easier way, you can skip the inside of the hood or follow the other time saving tips I have inserted throughout this post:
This post may contain affiliate links. Please read our disclosure for more info.
WHAT YOU’LL NEED:
- 1/2 yard gray velour
- 1/2 yard white velour (or do all gray for the inside of the hood)
- small piece of foam board (or cereal box for inside the fin)
- small piece of blue felt (optional for waves)
- 1/2 yard cord
- smallest amount of black felt and white felt for the eyes and mouth (I had both on hand)
- Gray Shirt
- Gray Pants
- Cotton Balls or something cushiony for stuffing the nose
I found both the gray shirt and pants at Target for very little money (around $15 total) and he was able to use the pants for the rest of the school year–a bonus!
TO MAKE THE HOOD:
There are two pieces to the hood. One for the outside, and one for the inside. The outside piece has the nose, and the inside piece does not need it. That way when you fit it together, the inside piece will hold the cotton balls or stuffing inside the nose. If you would like to skip the inner hood, you will just need to hold the cotton balls in another way. You could use clear packing tape or a piece of the gray fabric strategically hot glued so it does not come through the other side of the fabric.
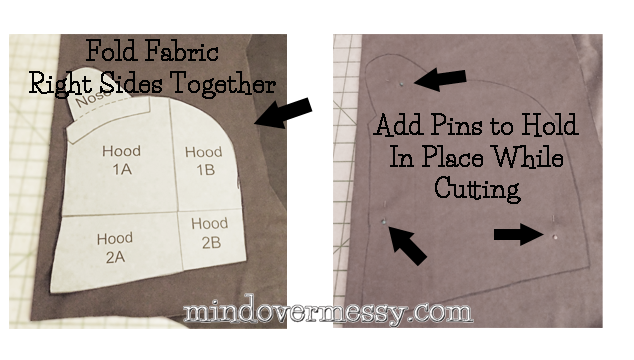
Once you have downloaded the pattern pieces above, arrange them together like this:
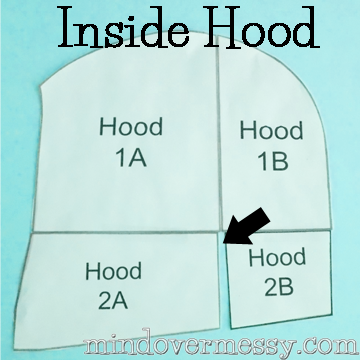
You can hold the paper pattern up to your child’s head and see if it looks the right size. You can add to the size by taping pieces in between 1A, 2A and 1B, 2B of the pattern to expand it and of course you can tape pieces to the bottom to make it longer. This was for a six-year old and also fit my four-year old. You will notice that 2A and 2B do not line up exactly. You can blame my scanner. I tried everything to satisfy the perfectionist in me, but it just will not scan in completely.
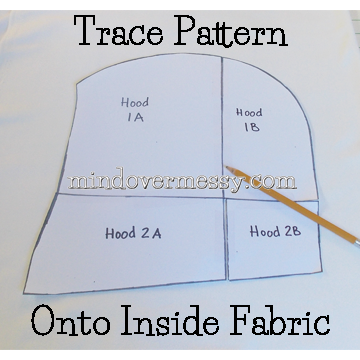
Once your pattern is taped together, fold your fabric in half with the wrong sides out (so pen does not show on your final hood). Place the pattern down and draw a line around it. I used pins to hold the two pieces of fabric together while I cut it out so they would be identical.
VERY IMPORTANT: THE PATTERN NEEDS TO BE TRACED ONTO YOUR FABRIC THAT IS FOLDED OVER WRONG SIDES TOGETHER, OR YOU NEED TO FLIP THE PATTERN OVER FOR THE SECOND PIECE IF YOU DO NOT WANT TO FOLD YOUR FABRIC. SEE “OUTER HOOD” FOR A PICTURE.
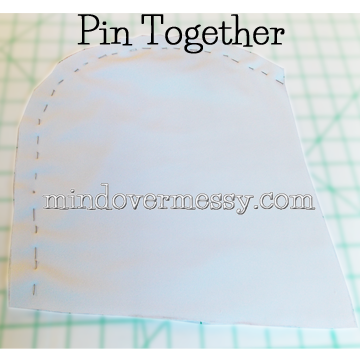
Pin your pieces together inside out and sew.
Flip it right side out and you are ready for the outer hood.
OUTER HOOD
You will do the same for the outer hood, but add the nose to the pattern first. Before you tape the nose onto the hood, you can play around with it to see if you want to tape it more at an angle. Just make sure there is some room between where the nose starts and the edge to allow for your front seam.

VERY IMPORTANT: TO TRACE THE PATTERN, IF YOUR FABRIC HAS AN “OUTSIDE” (IN THIS CASE VELOUR WAS SMOOTH ON THE OUTSIDE AND FLAT INSIDE), YOU NEED TO DOUBLE OVER YOUR FABRIC WITH THE WRONG SIDES OUT (aka the outside fabric is on the inside). OTHERWISE, THE PIECES WILL NOT MATCH. IF YOU DO NOT WANT TO DOUBLE THE FABRIC, SIMPLY TRACE THE PATTERN AND THEN FLIP IT OVER WHERE THE WORDS DO NOT SHOW AND TRACE IT AGAIN.
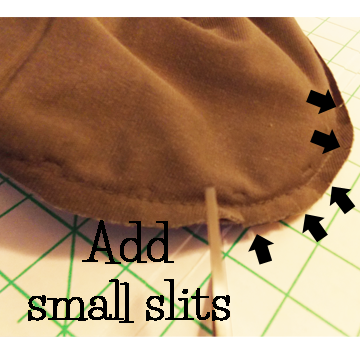
Sew the two pieces together, inside out. When you are done, it helps to cut tiny slits up almost to the seam around the curves of the nose. This keeps it more rounded. Then flip right side out again and you are ready to put the pieces together.
SEWING THE HOOD TOGETHER:
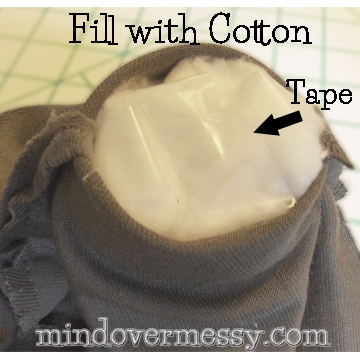
1) Stuff the nose with cotton and put tape across to keep it in place. I used simple scotch tape and it’s still together after a year.
2) Sewing the bottom seam of the inner and outer hood together with a very finished looking seam is the most complicated part of this whole costume. It’s not hard, but it did takes a minute to figure it out. IF THE WAY THIS IS SEWED SEEMS TOO COMPLICATED, PUT THE INNER HOOD IN THE OUTER HOOD AND SEW THE BOTTOMS TOGETHER WITH A ZIG ZAG STITCH ON THE OUTSIDE.
The hardest part of the way I sewed the two pieces together, is trying to explain it. Take a deep breath and try to stay with me. Hold the Outer Hood right side out and you put the Inner Hood as it will be at the end. Once you know how it will end up, you pull the inside down so it ends up almost upside down (wrong sides out) and you line up the bottom edges together.
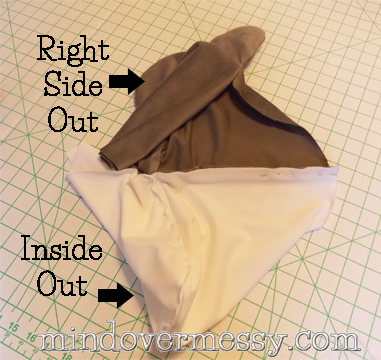
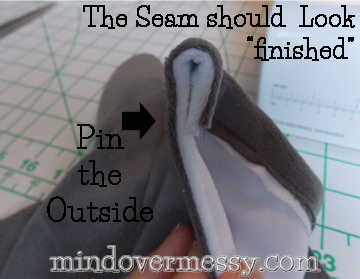
Hold it lined up with a few pins and then flip the Inner Hood back inside. Pin it together on the outside so that you can get the pins out when sewing. It ends up with a finished seam.
If you skip the inner hood, you can skip this step all together and just sew the bottom with the edges folded about a millimeter or do a zig zag stitch on the outside. The velour was messy fabric but something like felt may not even need a bottom seam. Your stitch will show on the outside but be barely visible.
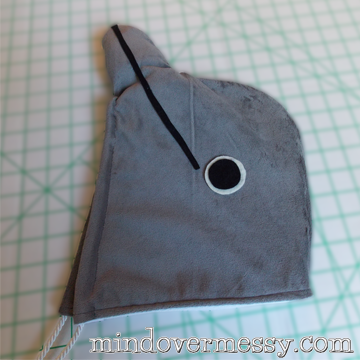
DRAWSTRING (OPTIONAL):
Once you have the bottom pieces sewn together, you can sew the front closed allowing room for the drawstring. I liked the idea of a string hanging out like it would on a hoody. However, we did not keep it tied shut, we left the string hanging so if that is not your style, you could use stick-on velcro to close it, or skip it all together and leave it open. The fabric had enough weight that it stayed in place. I bought the drawstring at Hobby Lobby and needed a 3/8 inch seam for it to fit. Rather than measure, I pinned around the drawstring to make it easy.

Now the hard part is over! Once the hood is made, everything else is super easy. Give yourself a High Five and celebrate!
THE FACE:
Use pieces of felt to draw the face and hot glue them on.
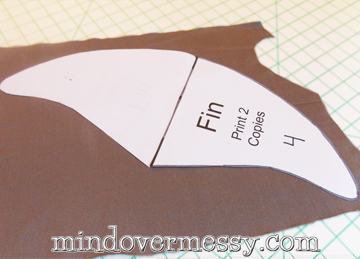
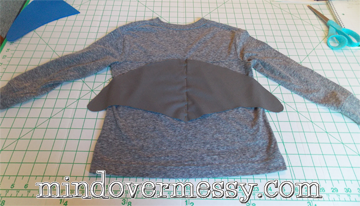
FIN:
The pattern for the fin is above. I recommend printing it twice and placing it on the fabric to trace like this:
Pin the fin open. Make sure the fin will be facing the right way!
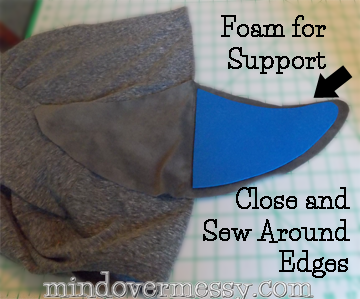
Sew down the middle attaching the fin to the shirt. Add the foam board, cut a little smaller to allow for the seam. Close the fin and sew around the foam board.
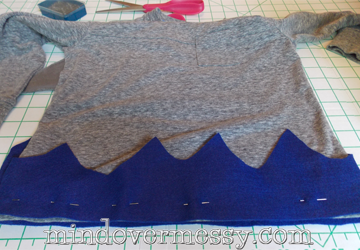
A LITTLE SOMETHING:
When all was said and done I decided to add the blue wave to the shirt to give the costume a little more whimsy. Simply cut felt into a wave pattern and sew the bottom edges. I put a few hand stitches to hold the top of the waves in place, super small so you couldn’t even see them.
I would love to see what dolphins you can come up with!


Update:
We still LOVE this sewing machine. It’s perfect for beginners and now even my son is using it to make little pillows or ornaments. It’s very simple and doesn’t over complicate the process for those of us who just need a few stitches and want to have it come out looking great! To see the sewing machine we love using Click Here.
Become part of our "Messy" community
and never miss a post.


Nicole is the Creator/Editor for Mind Over Messy. She has two "spirited" boys and a family that loves adventure. From enjoying a home cooked meal to night snorkeling in Hawaii, you can find it on this website. If you're interested in Guest Posting on MindOverMessy.com, click HERE for more information.

Nicole is the Creator/Editor for Mind Over Messy. She has two "spirited" boys and a family that loves adventure. From enjoying a home cooked meal, meditating, being present for even the most challenging moments, to night snorkeling in Hawaii, you can find it on this website. If you're interested in Guest Posting on MindOverMessy.com, click HERE for more information.
This is just what I am looking for…something relatively easy for a small school class play! I do not consider myself crafty or good at sewing but hope I can pull this off 🙂 Thanks!
If I can do it you can too! I do not have the patience for sewing, AT ALL. Good luck:)
Seems dangerous to have my child wear something with pins sticking in or out of it!! Has this become a problem?
Hi Kylie. Everything on the costume is sewn together. The pins are in the pictures to show where to sew it. My son is an accident waiting to happen, so he and pins would not mix! Thank you for stopping by and letting me clear that up:) – Nicole
Question on the fin…you say to close and sew around, wouldn’t this leave the edges rough? It doesn’t look that way in the picture, but I don’t see anyway around it from the instructions?
Also, when sewing the hood drawstring do you just fold the fabric over the drawstring and sew from the inside? Is there anything you do to make those edges smooth or is this seam nice and hidden when the hood is on?
Thanks! Excited about this! Have already cut out and started sewing the outside of the hoods!
You sew the fin inside out and then flip it over.
For the drawstring, yes sew from the inside.
I missed your comment earlier so I’m sure you’ve figured this out by now, but I hope it turned out great!
Nicole
But how do you attach it to the top if you sew it inside out?
My son decided he wanted to he a dolphin for his school’s character parade (his book choice is a novelization of the movie Dolphin’s Tale) and dolphin costumes are few and far between for 6 year old boys. I was very thankful when a quick Google search turned up this website and the pattern you provided here! The dolphin “hat” was a big hit and I made a little fleece tunic with the fin and added a tail. He is very happy and I am so glad I found this website and pattern!
Thanks heaps for posting this pattern! My daughter is delighted with the outcome. I used a pair of old jeans that had some stretch in them and it worked a treat! Didn’t bother with the double layer and hand stitched it all together as I have no sewing machine which was doable
I would’ve never thought to use jeans! How cute:) – Nicole
I believe that is one of the so much important info
for me. And i’m happy reading your article. However wanna observation on some general issues, The site style is ideal, the articles
is in point of fact excellent :D. Excellent activity, cheers.
Hello! My four year old would like a dolphin costume for Halloween, and this one here looks just my skill level. Thank you! However, I’m having trouble finding grey velour and white velour, especially options that are reasonably priced. Is there another fabric I can use?
That’s too bad about the fabric! At the time it was easy to find and inexpensive. I have to say, I’ve made many costumes with felt because it’s easy to work with (you can hot glue it) and inexpensive. It would certainly work easily for the fin and that’s what the waves on his t-shirt are made with. You may want to give good old fashioned gray felt a shot and see how it looks! Lmk what you come up with.
After seeing the inner & outer hood together at the bottom seam, do you sew the 2 front sides of both hoods together? I’m trying to figure out how to finish off the seams along the face. Thanks for any instruction on this!
Hi Kathy. I’m not sure if I understand your question right, but I sewed it inside out so that there wasn’t a seam in the front. I then added the drawstring to it. It felt complicated at the time I did it but ultimately worked out well! Hope that helps.
So is the pattern as downloaded and printed the correct size or do I need to enlarge it for a 6 year old
I would hold the paper up to their head when printed to see if it looks like it will fit. You could even tape it together as a pattern to make sure. Every head size is different and I’d hate for you to go through all the effort and have it not fit! Good luck 🙂
Thanks for the pattern! I’m excited to give this a try. I was hoping to make it for my 3 year old and 1.5 year old for Halloween this year. Which parts of the hood would you shrink in order to make it fit them?