
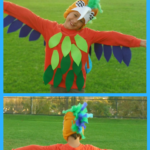
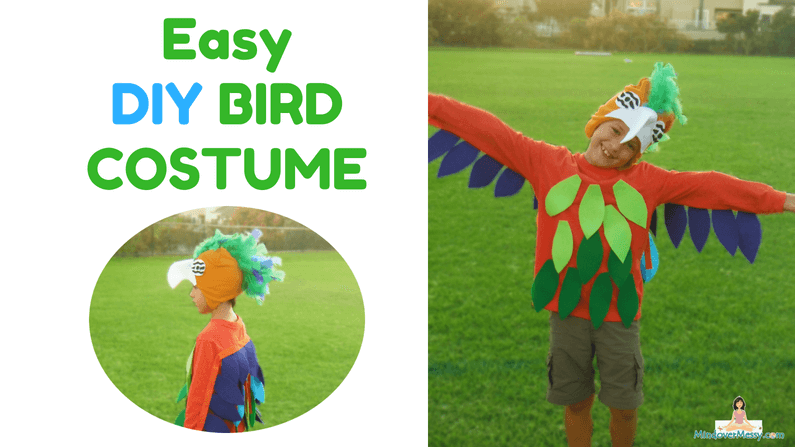
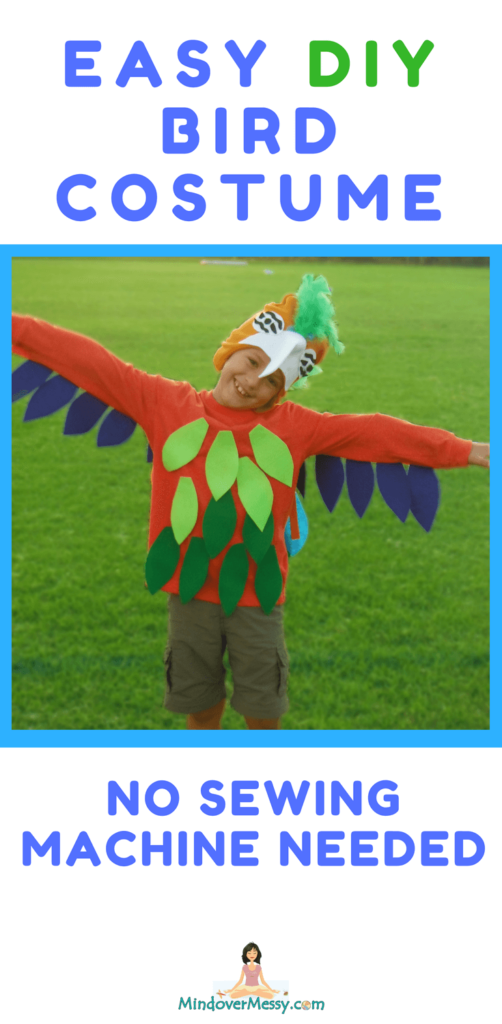
DIY Bird Costume – No Sewing Machine Needed!
This year I broke up with the sewing machine to make this costume and I couldn’t be happier. If you are a person, like me, who rarely uses the sewing machine, it can feel like such a battle! The way I want something to look and my actual skill set, sadly, are not the same thing. So this year, when my son decided he wanted to be a Macaw for Halloween, I immediately decided I would buy a hat instead of make one (I’ve made two in order for him to be Peso Penguin and a Dolphin and that was plenty!). I found a Teenage Mutant Ninja Turtle hat at Target and turned it inside out. The rest is a few hand stitches and some hot glue. I ended up having more time to work on the creative part and no time spent frustrated trying to make a hat from scratch (like last year). It ended up being a SUPER hot Halloween for us so we opted for shorts, but feathers on the pants would’ve been adorable!
He loved the costume and ran around in it like crazy. I felt it was up there with one of the easiest costumes to date and I hope you find it that way too.
This post may contain affiliate links. Please read our disclosure for more info.
Here’s how to make this:
Materials Needed:
- Bias Tape like this one.
- Hat that you can glue feathers to. We used one similar to THIS ONE turned inside out with the ropes cut off. This one will need two ears cut or extra feathers in that spot.
- Small amounts of Felt in different colors for the feathers on the t-shirt. White and black for the eyes (you could use a felt square)
- Plain long sleeve shirt.
- Bag of feathers – We used the 4-6 inches size like THESE
- Hot glue gun.
- Needle and thread.
- Pants or shorts.
To make the shirt:
SHIRT
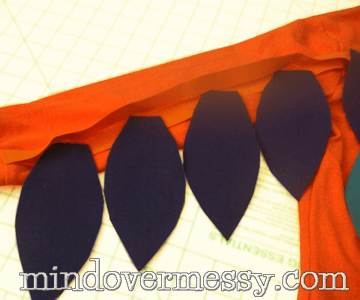
For the shirt, I used bias tape and hand stitched one side of the bias tape to the shirt – across the arms and back. Next, I hot-glued the feathers (made of felt) to the bias tape. You can glue them right inside where the bias tape opens up because you’ll want to glue it down over the feathers when you’re done.
FELT FEATHERS
I usually give you guys a pattern with my costumes, but this one I just cut by hand since felt is so easy to work with. To make the feathers I practiced cutting one with the felt and then used the one I liked best as a pattern. I put the “pattern feather” on the felt and cut around it to make the rest of the feathers. You may even experiment with different sizes.
For the back of the shirt to make the feathers hang down and be free flowing, I cut strips of orange felt. I then hot glued the feathers to the strips, which I then hot glued to the bias tape. You can see it in the photo below as one strand is flipped over. I’m sure you could easily glue them to one another but I knew my son would run a lot and thought it would be fun if they moved.

Once all the feathers were in place, I hot glued the bias tape shut. It all held together surprisingly well!
The front of the shirt has the feathers hot glued on too. I did put a piece of cardboard inside the shirt while I was gluing them on just to make sure I did not accidentally glue the shirt shut. I was pretty sure I would cry if right at the end of making the costume I ruined the shirt! I put a few squiggles of glue on each feather and they stuck to the shirt fine and not at all to the cardboard inside.
To make the hat:
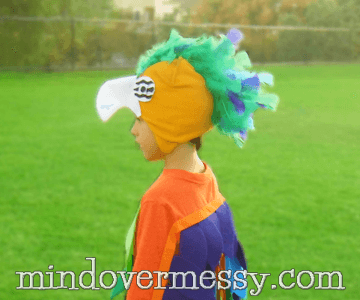
We used a hat that had ear flaps. similar to THIS ONE, which I think helped give it a cute shape, and I cut off the ropes that hung down on the sides. It was Teenage Mutant Ninja Turtles hat, turned inside out (the seam showed a little but not enough to be a problem). The closest one I found to the one I used is THIS ONE but I can’t see inside to know if it’s completely orange. The good news you can cover it with feathers either way!
I used white felt to cut out the eyes and beak and hot glued black felt squiggly stripes on the eyeballs. The actual pupil has a tiny bit of green felt behind it and then a white square to make it stand out.
The beak is also hot glued together.
Once I hot glued the beak and then eyes to the hat, I used the bias tape to make a strip down the center of the hat. I hand stitched a seam down the middle – once again open so that I could glue the feathers inside (think about making a mohawk!). I found a bag of feathers at Hobby Lobby, similar to THESE and glued them to the bias tape, closing the tape together as I glued.
Basically, the bias tape is sewn to the hat, and then holds the bottom part of the feathers in like an envelope sealed with hot glue. You can then add a few to the outside and done. Watch your fingers on this part! I glued mine more than once and yes it does hurt when you burn them.
I had planned to glue some feathers to sweats for the pants, but we had a heatwave instead – so there went that idea. Crazy weather, right? And there you have it, one very happy Macaw. I can’t wait to see what my son comes up with for his costume for next year. He definitely keeps me on my toes!
If you make a bird costume, I’d love to know how it comes out. Especially if you have the chance to add in some pants. Let me know in the comments.

QUICK LINKS FOR THE COSTUME:
And I just noticed these fun feathers, how cute would that be???
Super cute costume!! Very clever!!
Thanks MayLynne!
Wonderful costume turned out. The main child happy!!!
Thank you for sharing!
Hahaha! I love this costume. My 10 year old has been challenging my (very, very basic) sewing skills since he was about 4 with his Halloween costume requests. We’ve done a Halloween Christmas tree (complete with battery powered lights!), he was a giant pumpkin, a pumpkin king (NOT Jack Skellington), a Roman gladiator (sorta, based off the Percy Jackson books) and this year he wants to be a VIKING TURKEY. So now I am wracking my brains to figure this one out! 🙂